Introduction
A number of predefined project and item templates are installed with Visual Studio. These templates, such as the ASP.NET Web Application and Class Library templates, are available to choose from when you create a new project. Item templates, such as code files, XML files, HTML pages, and Style Sheets, appear in the Add New Item window.
These templates provide a starting point for users to begin creating projects, or to expand existing projects. Project templates provide the files that are required for a particular project type, include standard assembly references, and set default project properties and compiler options. Item templates can range in complexity from a single empty file that has a certain file extension, to multiple source code files with stub code, designer information files, and embedded resources.
Multi-project templates act as containers for two or more projects. When you create a project that’s based on a multi-project template, every project in the template is added to the solution. A multi-project template has two or more project templates, and a root template of type ProjectGroup. Multi-project templates behave differently than single project templates.
Required Tools
- Visual Studio 2015 or greater (We’ll be using Visual Studio 2017)
- .NET Framework
- NET Web API
Required steps
Steps involved to create a multi-project template for visual studio can be enlisted as below:
- Create a blank solution
- Addition of common project (.NET Framework class library)
- Addition of extension class for common project
- Addition of service project (.NET Framework ASP.NET Web API)
- Removing unused libraries
- Removing unused files and codes.
- Customization of project structure
- Referencing common project to service project
- Export template wizard
- Copying exported files
- Create root.vstemplate
- Managing project references dynamically
- Compression to create template
- Copying to ProjectTemplate
- Creating new project based on template
- Re-installation of packages
- Importing references
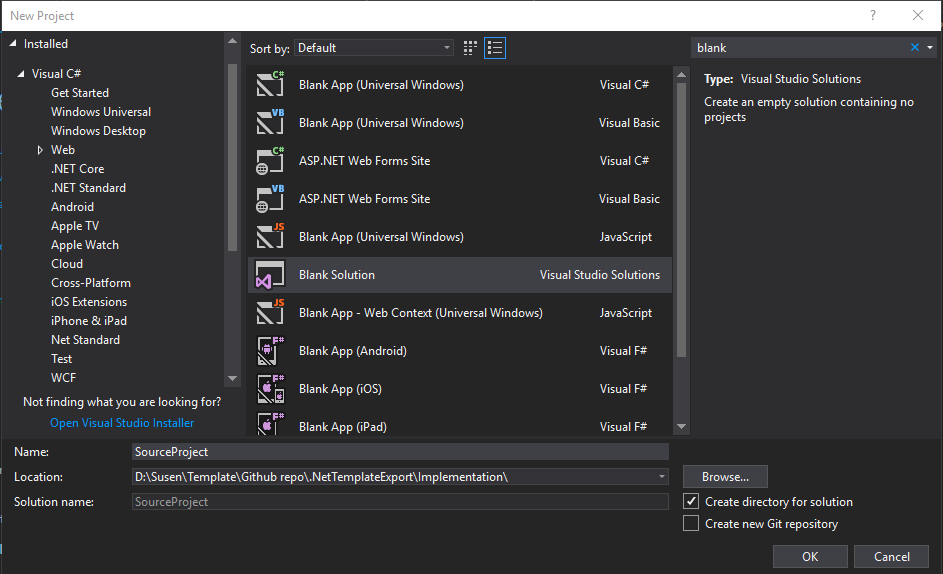
Step 1: Create a blank solution
First step to create a template will be to create a blank solution. Blank solution can be created by selecting File->New->Project and searching ‘blank solution’.
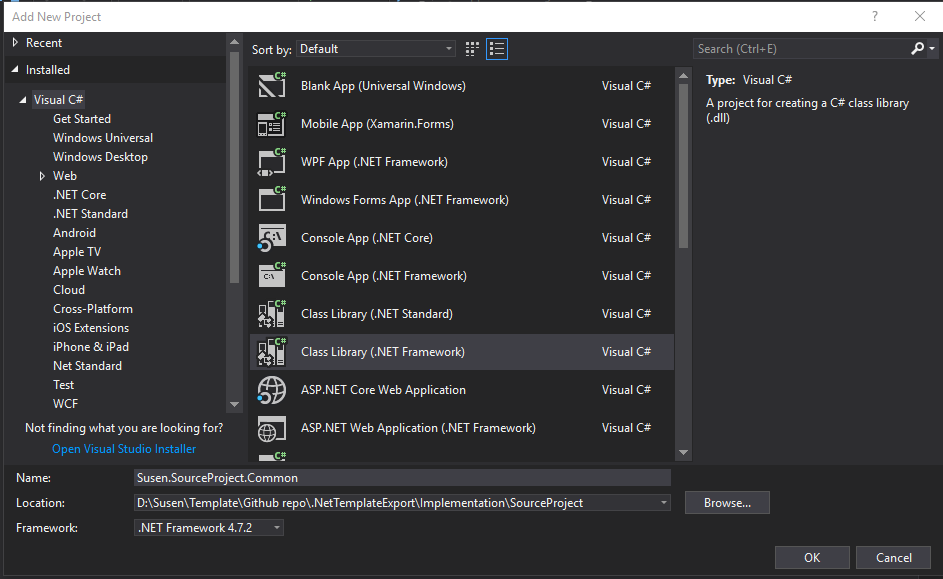
Step 2: Addition of Common project (.NET Framework class library)
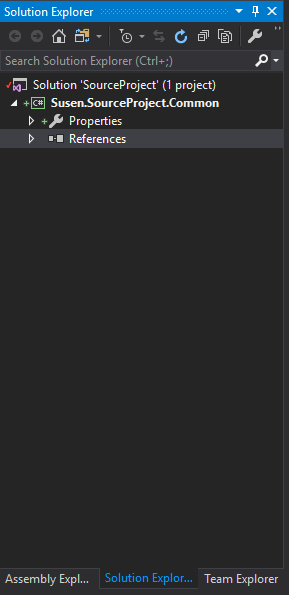
In the next step, we will add a new project to the solution. Right click at the solution and then select add -> New project. Select ‘Class Library (.NET Framework)’ and provide the name of the project. In this case, we have provided ‘Susen.SourceProject.Common’ name to the project. We can provide any name to the project.
Following figure shows the solution explorer once a project is created.
Step 3: Addition of extension class for common project
We will add two extension classes in this project, solely for testing purposes. AsyncHelper and JsonExtension will be added as an extension class in this project. We’ll also need to add Newtonsoft.Json through nuget package since JsonExtension will be using it.
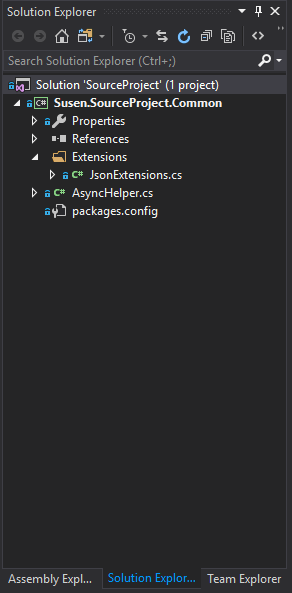
Above figure displays the project structure of Common project.
Step 4: Addition of service project (.NET Framework ASP.NET Web API)
Afterwards, we will move forward to create another project. This time, we will select ‘ASP.NET Web Application (.NET Framework)’ and provide project name. In this case, we have provided project name as ‘Susen.SourceProject.Services’. Once we click ‘OK’, another window will be displayed with ASP.NET templates. We will select Web API and finalize the project creation.
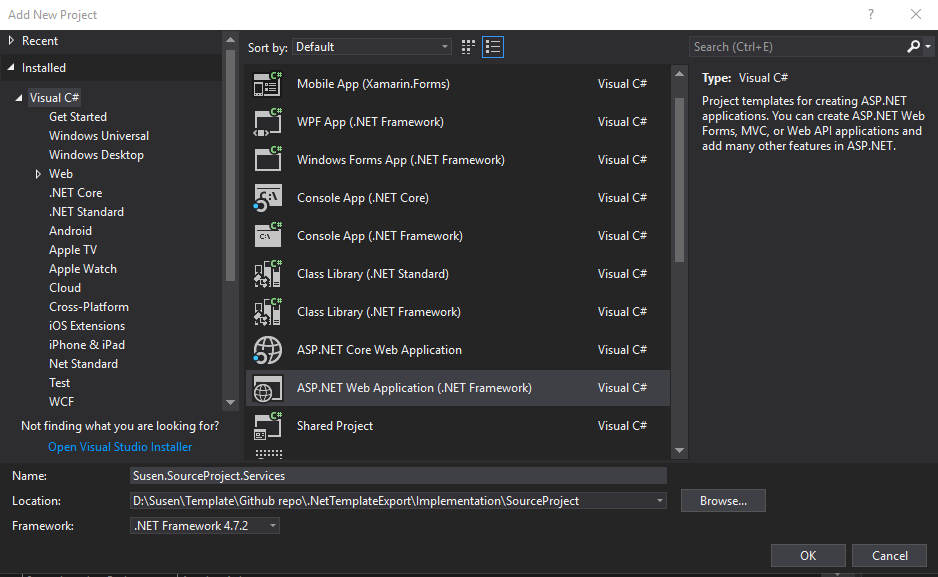
Above figure shows the process to create a new ASP.NET Web Application

Above figure displays selected ASP.NET Web template.
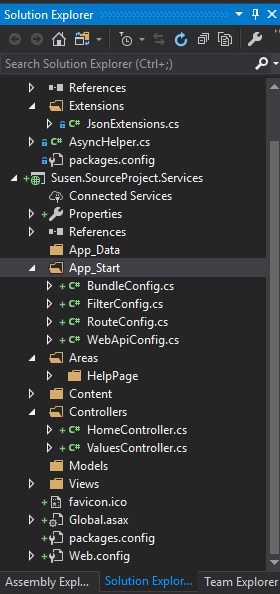
And this is how a default ASP.NET Web API project will look. We will tweak the project structure in upcoming steps.
Step 5: Removing unused libraries
In order to keep template clean, we will remove unused bloatware libraries which are installed with ASP.NET Web API template by default. Following are the libraries which we have removed from Service project.
- Bootstrap
- jQuery
- Microsoft.AspNet.TelemetryCorrelation
- Microsoft.CodeDom.Providers.DotNetCompilerPlatform
- Microsoft.AspNet.WebApi.HelpPage
- Modernizer
If we need to add these removed projects, we can always add them back through nuget package.
Step 6: Removing unused files and codes
With the same objective as of previous step, i.e. to keep template clean, we will also remove unused files and codes. In the service project, we will remove codes and files as below:
- Empty RegisterBundles() method in BundlesConfig.cs
- Remove Areas folder along with it’s subfolders (HelpPage, Views)
- Remove ValuesController
This is how project structure will look after cleaning up unused files and codes.
Step 7: Customization of project structure
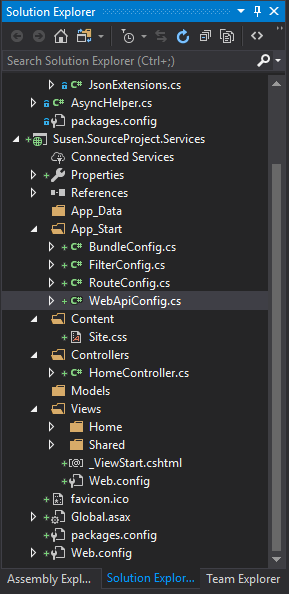
Project structure can be customized according to the requirement and demands of the project. In this article, we will be adding business access, data access, entities, handlers and services in the project structure. We can always modify the structure of a project according to the requirements. In the project, we will be adding following directories and classes to customize the project structure.
Business Access
- Interfaces
- Mocks
- Services
DataAccess
- Abstract
      1.1. Database.cs
      1.2. Repository.cs
- Databases
      2.1. SqlDatabase.cs
      2.2. UserContext.cs
- Interfaces
      3.1. IDatabase.cs
      3.2. IReposiotory.cs
      3.3. IUserContext.cs
DataAccess.Data
- DataConstants.cs
- DataExtensions.cs
DbUp
- Scripts
Entities
- Args
      1.1. Abstract
- Results
Handlers
Services
- Abstract
- Interfaces
- Proxies
- Requests
Our service project structure will look as displayed on above figure after we have modified its structure.
Step 8: Referencing common project to service project
In this step, we will implement the final processes required before exporting a template.
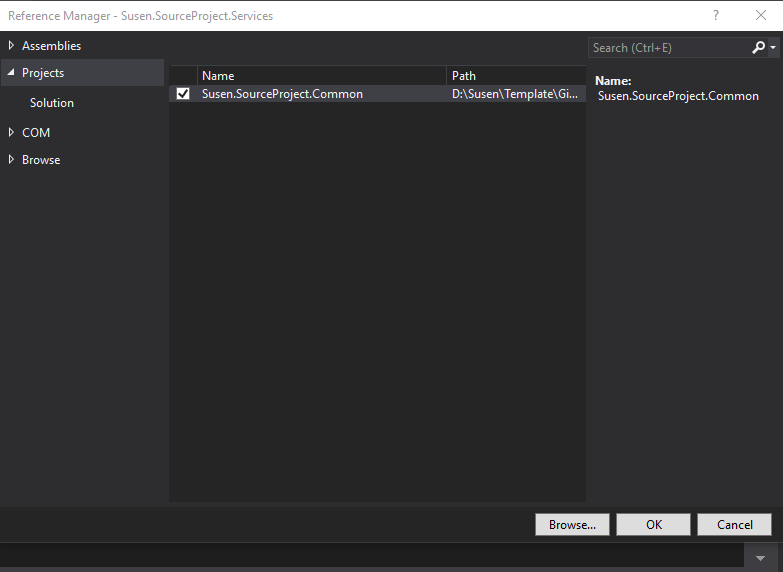
In order to user common project within service project, we will need to add its reference. Reference can be added by right-clicking project, Add-> References… and selecting the common project.
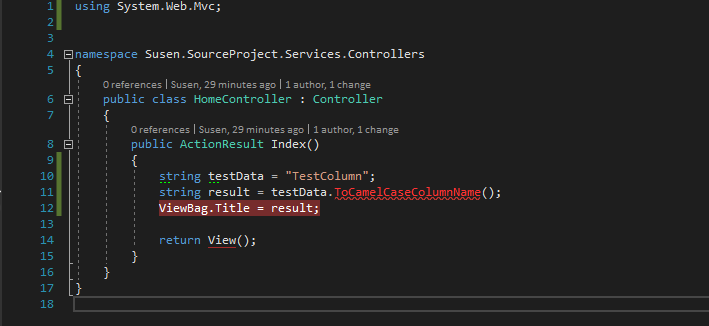
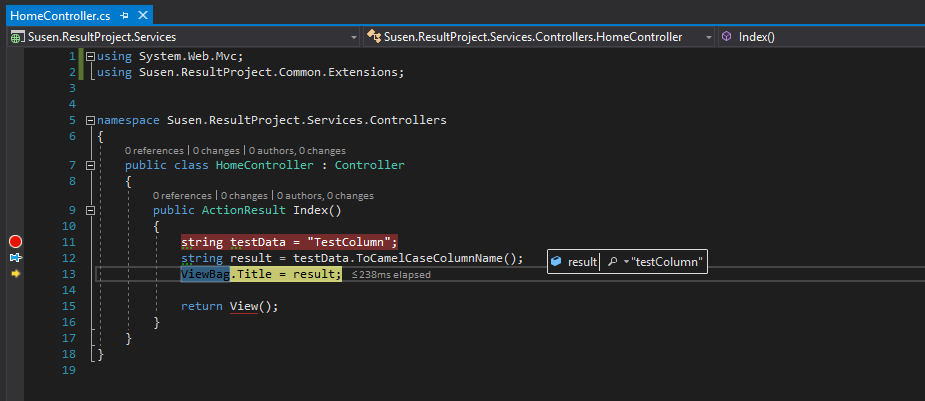
For testing purposes, we will add following code in Index action of HomeController.
using System.Web.Mvc;
using Susen.ResultProject.Common.Extensions;

namespace Susen.ResultProject.Services.Controllers
{
   public class HomeController : Controller
   {
       public ActionResult Index()
       {
           string testData = "TestColumn";
           string result = testData.ToCamelCaseColumnName();
           ViewBag.Title = result;

           return View();
       }
   }
}
Above code will simply use ToCamelCaseColumnName() method of JsonExtensions which is imported from Common project. We can see that the directory of JsonExtensions is imported from ‘using Susen.ResultProject.Common.Extensions’.
For confirmation, let’s debug the project before exporting the template

As we can see from the above figure, referenced method ToCamelCaseColumnName() is working perfectly fine.
One final step which is not mandatory is to remove the common project’s import directory. I.e. to remove ‘using Susen.ResultProject.Common.Extensions’. In case of large project, we’ll need to remove all those import lines. This step is not compulsory but is a better approach to remove errors which will be generated when creating a project through custom template.
After this confirmation, we are now ready to export the template with these project structures.
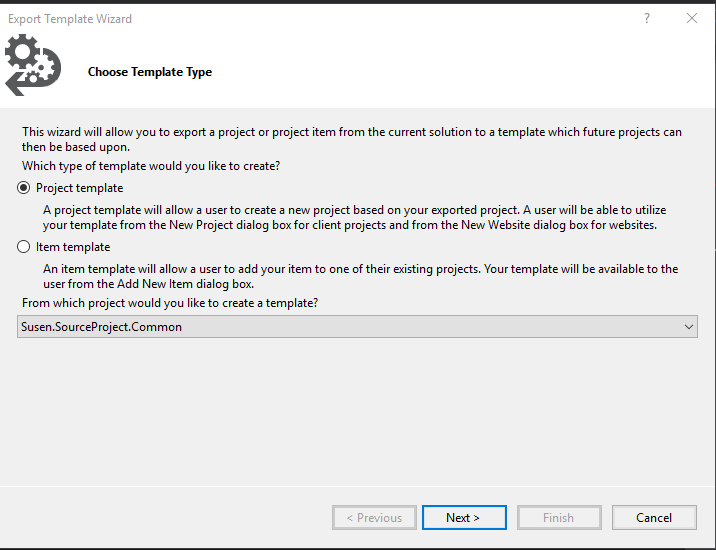
Step 9: Export template wizard
After we complete all of the above steps, the project is now ready to be exported as a template.
In order to export template, we’ll need to follow the steps as below:
- On project menu click Export Template…
- Then Export template wizard will open
- On the Choose Template Type page, select Project Template. Select the project you want to export to a template, and then choose Next.
- Since we have two projects (Common and Services), we’ll need to repeat all this steps twice for each project.
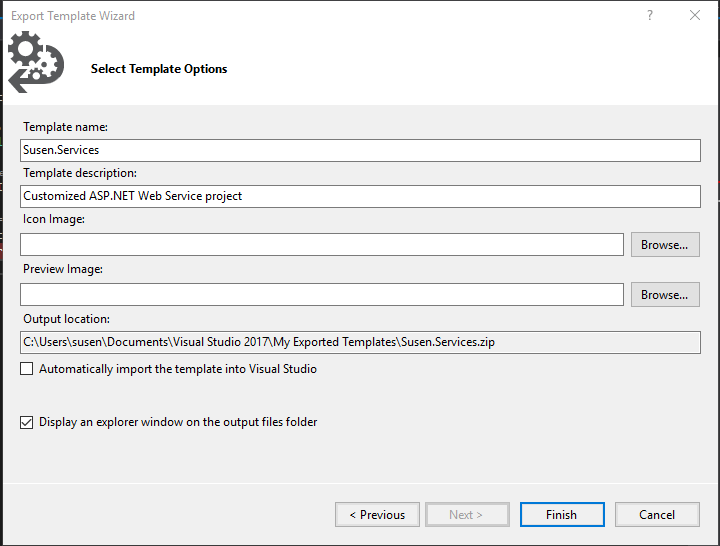
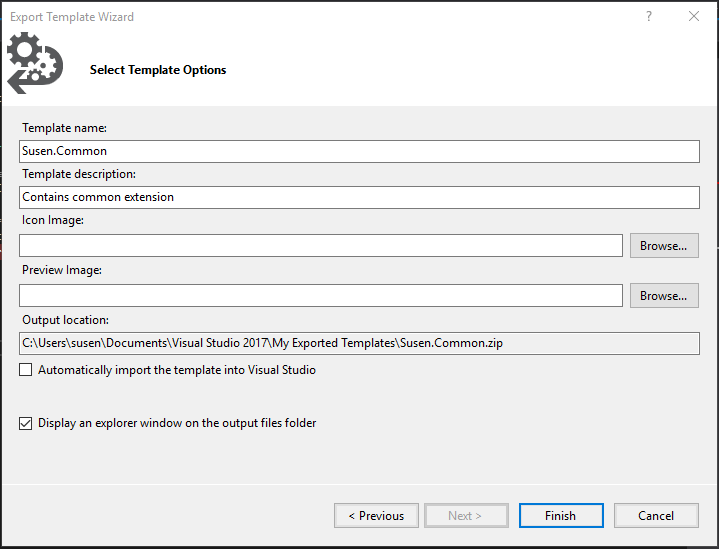
- On the Select Template Options page, enter a name and optional description, icon, and preview image for your template. These items will appear in the dialog box where you create a new project. Choose Finish. We will uncheck ‘Automatically import the template into Visual Studio’ since we need to configure template for multiple projects.
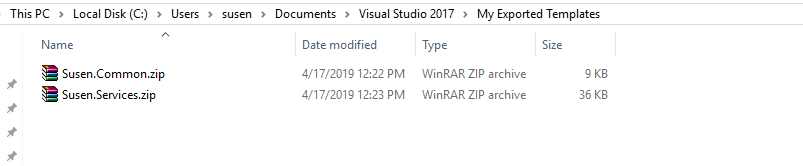
The project is exported into a .zip file and placed in the specified output location, and, if selected, imported into Visual Studio. In our case, .zip file will be saved in ‘Documents\Visual Studio 2017\My Exported Templates’ directory.
We can see that the .zip file has been exported in the figure below.
Step 10: Copying exported files
Once all .zip file has been exported, we’ll copy/move these entire files into the directory where we will configure the multi-project template. We have copied these files at ‘\.NetTemplateExport\Template Configuration’ directory in given case. Then we will extra both of these zip files in the given directory.
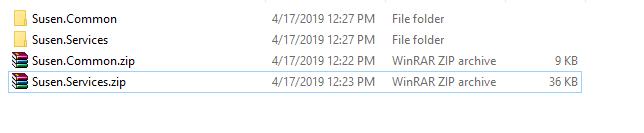
Above figure displays the copied zip files and its extracted folders. We can delete the zip files if we wish to.
Step 11: Create root.vstemplate
In the same directory where we have extracted the template, let’s create a new file ‘root.vstemplate’. Then we can edit the file and add following XML code.
The XML nodes of ‘root.vstemplate’ can be explained as below:
<VSTemplate Version="2.0.0" Type="ProjectGroup"
   xmlns="http://schemas.microsoft.com/developer/vstemplate/2005">
   <TemplateData>
       <Name>Susen Template</Name>
       <Description>Custom ASP.NET Web services project</Description>
       <Icon></Icon>
       <ProjectType>CSharp</ProjectType>
   </TemplateData>
   <TemplateContent>
       <ProjectCollection>
               <ProjectTemplateLink ProjectName="$safeprojectname$.Common">
                   Susen.Common\MyTemplate.vstemplate
               </ProjectTemplateLink>
               <ProjectTemplateLink ProjectName="$safeprojectname$.Services">
                   Susen.Services\MyTemplate.vstemplate
               </ProjectTemplateLink>
       </ProjectCollection>
   </TemplateContent>
</VSTemplate>
- TemplateData: Â This node will contain sub-nodes which will be used to display while creating a new project.
      1.1. Name: We will provide the name of a template in this node. This field is mandatory.
      1.2. Description: Here we will provide the description of a template.
      1.3. Icon: We can provide icon image to be displayed for template in this node.
      1.4. ProjectType: We’ll add CSharp in this node since out project is based on C#.
- TemplateContent: This template contains sub node to define template structure and its contents.
      2.1. ProjectCollection: In this node, we will add sub-node ProjectTemplateLink to link with an individual template. We can add multiple sub-             nodes in this ProjectCollection node.
      2.2.1. ProjectTemplateLink: In this node, we will provide the name of individual project and location of its template. In order to dynamically               create a project name, we can add $safeprojectname$ in ProjectName attribute. It can be customized according to the requirement.
Step 12: Managing project references dynamically
In order to make project reference dynamic, we’ll need to edit the .csproj file of Service project. In broad case, we’ll need to edit every reference to make them dynamic with template. In .csproj file, we’ll need to find ProjectReference node and edit its attributes and sub-nodes.
In our case, we’ll need to edit the solution name dynamically by replacing static solution name with $(SolutionName) in ‘include’ attribute and ‘Name’ sub-node. Because, whenever we create a new project based on custom template, its project name should match with the solution name. If not, the project name will always be constant.
I.e. whatever we provide the name to the custom template project, it will always reference as ‘Susen.SourceProject.Common’ which will be invalid. In such case, we will need to manually remove the reference and add the common project’s reference.

This is how ProjectReference will look like before we edit .csproj file.

And this is how ProjectReference will look after editing .csproj file. Once this step is completed, then the project reference will be dynamic based on it’s solution name.
Step 13: Compression to create template
After completing step 12, we are now ready to create a multi-project template. We’ll need to compress all individual templates along with ‘root.vstemplate’ into one .zip file.  We need to select all the individual templates and ‘root.vstemplate’ and click right-click -> Send to -> and click ‘Compressed (zipped) folder’ and provide any suitable name for .zip file.
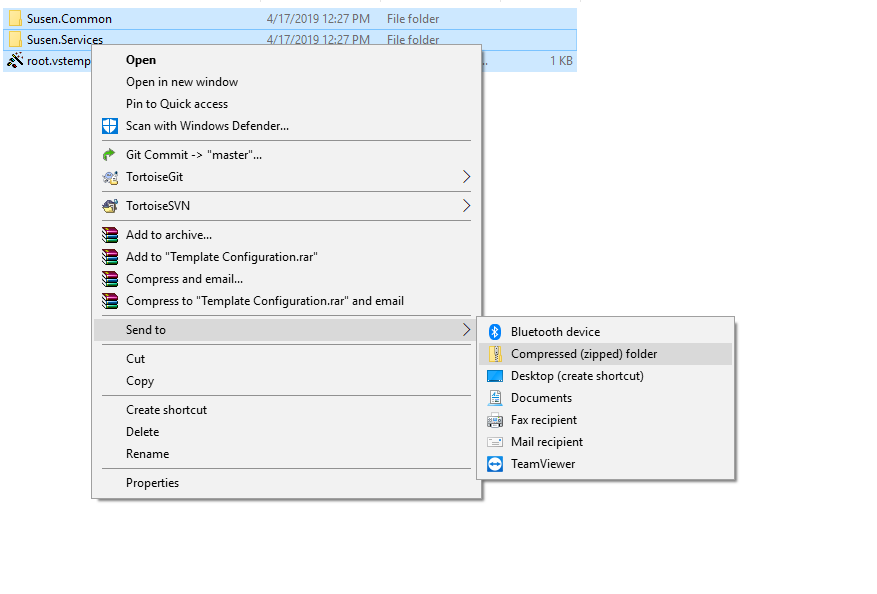
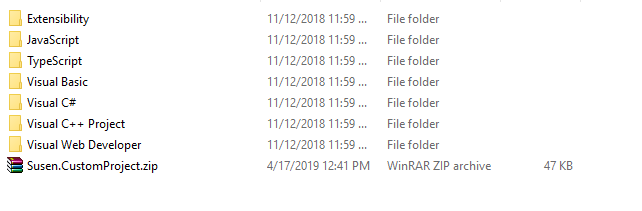
After compression, the directory will be displayed as figure below. Here we have compressed required files into ‘Susen.CustomProject.zip’ file.

Step 14: Copying to ProjectTemplate
Once multi-project template’s .zip file has been created, we’ll need to copy or move it into the ProjectTemplate directory of visual studio. It is located in ‘Documents/Visual Studio 2017/Template/ProjectTemplates’ directory.
ProjectTemplates directory will look as above figure after copying the .zip file. The template is now ready to be used.
Step 15: Creating a new project based on template
Re-open the Visual Studio, and from the file menu, select New -> Project …
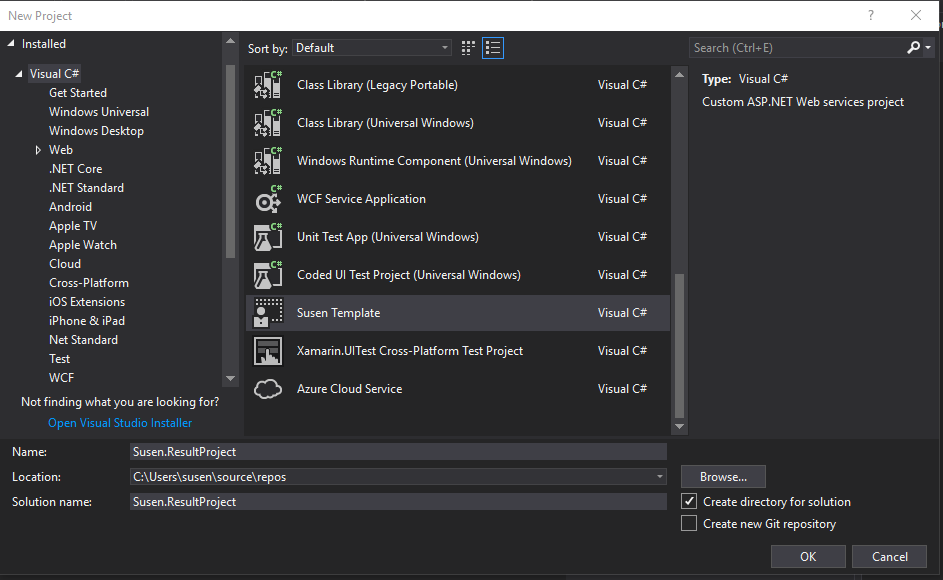
Select Installed -> Visual C# menu and there we can find our newly created custom template as ‘Susen Template’. Select it and provide a name to the project, then click OK.
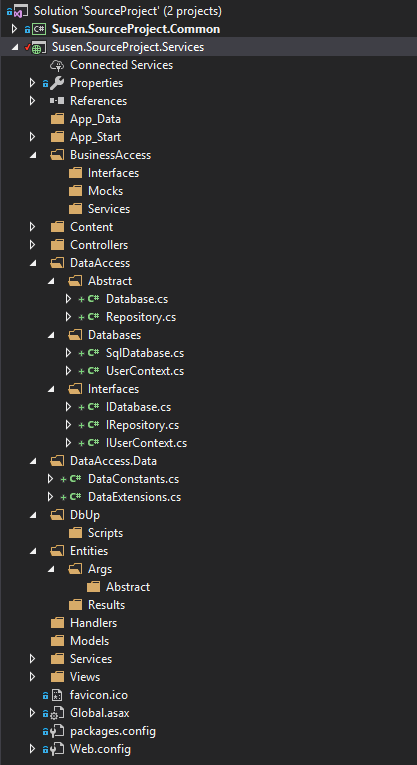
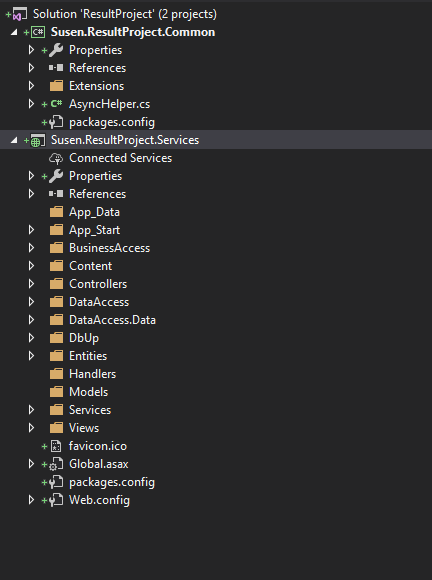
Project with custom multi-project template is now successfully created. Â Its project structure can be seen as shown in following figure.
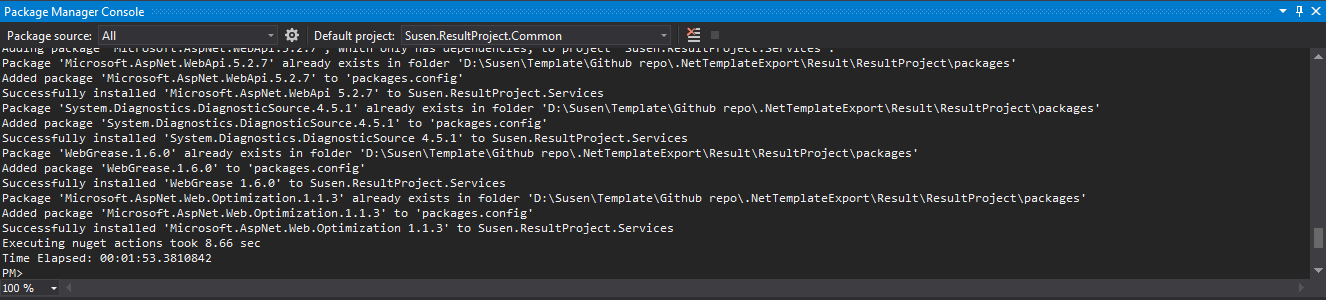
Step 16: Re-installation of packages
After project has been created, we’ll need to reinstall the packages. We will use it since references to a package might get broken within a Visual Studio project. In these cases, uninstalling and then re-installing the same version of the package will restore those references to working order. We can reinstall packages through package manager console. It can be opened through Tools menu -> Nuget Package Manager -> Package Manager Console.  Nuget command to re-install packages is
update-package -reinstall'
Step 17: Importing references
If we go back to step 8, we have removed the import references of common project. It is also explained there that we can keep those import reference if we want since it isn’t a mandatory process. However if we had chosen the latter option, there would’ve been an error while creating a project with multi-template project. There will be ‘using Susen.SourceProject.Common.Extensions;’ instead of ‘using Susen.ResultProject.Common.Extensions;’. We would have to manually remove those import lines.
But if we had chosen the first option, we will only need to import the reference which can be easily achieved in visual studio (ALT+ ENTER or ALT+.).

Testing project
Now let’s test if the project is working. We’ll need to set Service project as a Startup project and then run the project in debug mode.
As we can see in the above figure, the project is working fine. Hence we can conclude that the multi-project template’s project is successfully created.
Conclusion
Project templates are easy to customize, and they can help us avoid repetitious setup efforts. These tools can be used for a diverse array of purposes, but one of the primary benefits of templates is the rate of completion they lend to projects ranging in size and necessary effort. Instead of developing a new project every time we send a memo or a design pitch, you can reuse the template and simply change the desired information. All the codes and files used to create this test project can be accessed from GitHub.
References
- https://docs.microsoft.com/en-us/visualstudio/ide/how-to-create-project-templates?view=vs-2017
- https://docs.microsoft.com/en-us/visualstudio/ide/how-to-create-multi-project-templates?view=vs-2017
- https://www.c-sharpcorner.com/article/how-to-create-multi-project-template-using-visual-studio-2017/
- https://rehansaeed.com/custom-visual-studio-project-templates/