Azure Devops is a platform that provides set of integrated tools to support collaborative software development, including Git repository,work boards,CI/CD and more. In short it is a bundle of tools for one’s devops need. Azure devops provides Azure boards, Azure Repo, Azure Pipelines, Azure Artifacts, Azure Test plans as services that are extensible and can be used for any kind of application platform regardless of the framework. There is no restriction on how it can be used, using Azure pipeline to build a node app hosted in GitHub and deploy it to any platform or to any cloud provider it can all be done. Microsoft provides Azure devops as a service or as a server which can be hosted on our own machine.
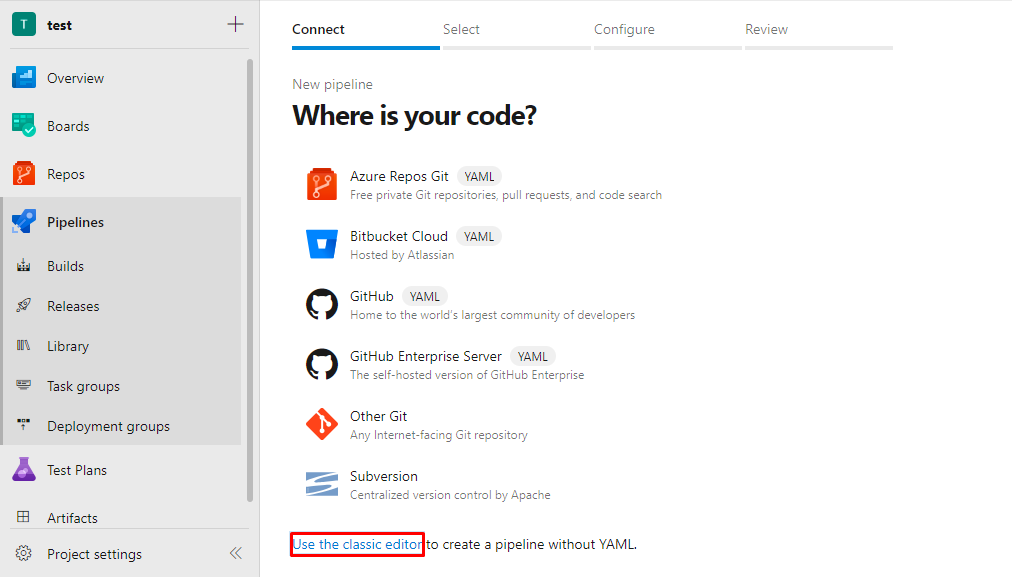
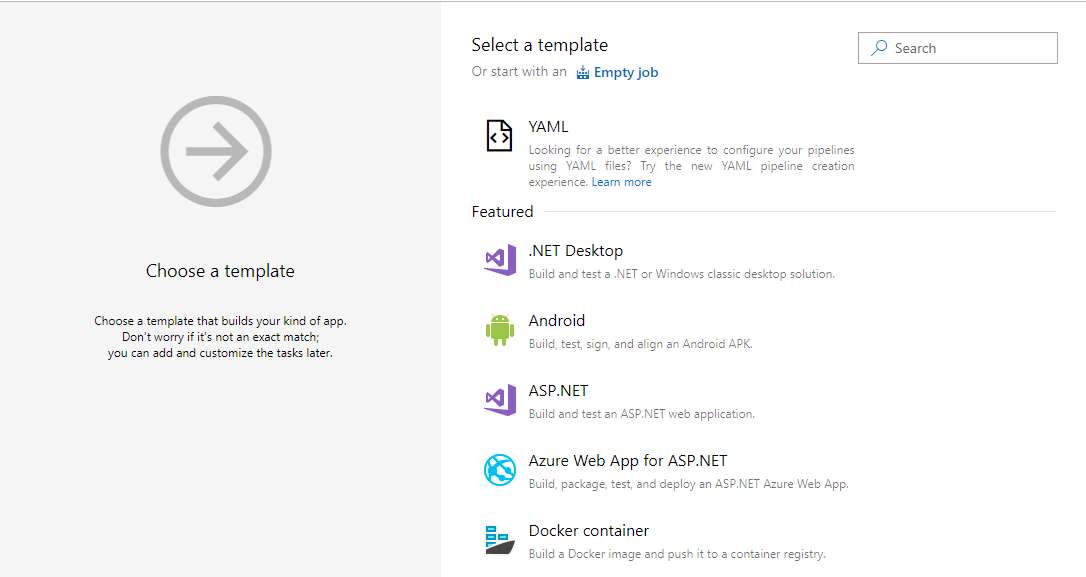
Since Azure pipeline can be used with any language and supports many source control providers we can we use any project we want from any provider we have our project hosted on. Log in to the azure devops organization and choose a project to work with. Navigate to Pipelines then chose build and new build pipeline to set up a new build. In the build wizard choose the source of your repository and follow along the wizard,If the projects contains azure-pipeline.yml that will be used for the build or the pipeline will suggest a yaml template based on the project selected then click run to initiate the build. Instead of yaml we can also use  template editor to configure the build.Template editor allows user to pick job template with task as per project type,add steps and configure as required.
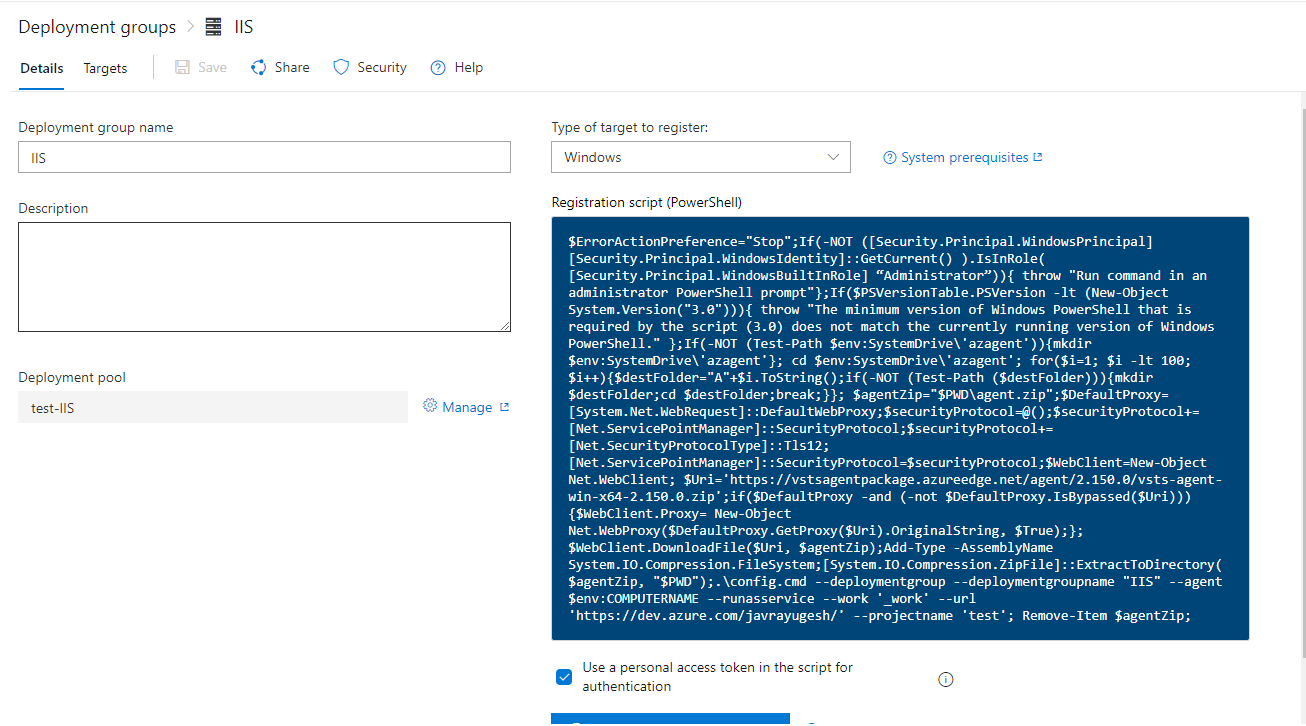
Before deployment a deployment group needs to be defined.A deployment group is a collection of target machines on which we deploy our app to with azure agent pipeline on. To set a deployment group navigate to pipeline and choose deployment groups and add deployment group.Enter the name for the group and click create.In Details section choose the target machine type,check Use a personal access token in the script for authentication checkbox and copy the script. Execute the script on the command window as administrator. The script will automatically download the agent and prompt for user input when needed to configure. After the script is done the registered machine can be located on target tab of the deployment group and can be used to host the app. This approach is needed for locally hosted VMs and machines, for cloud deployment service connection is required.
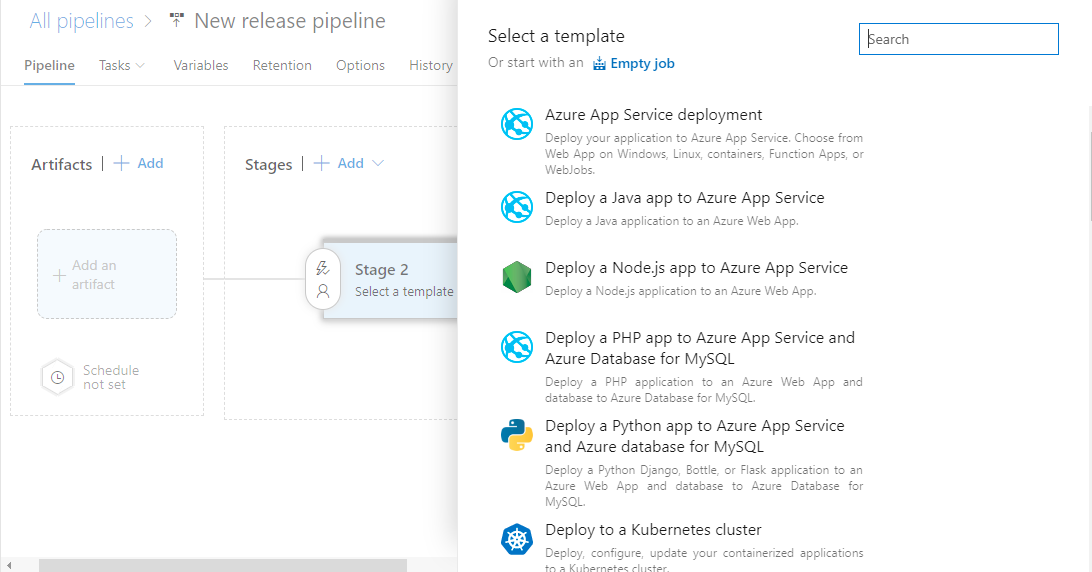
After the build is completed navigate to Pipeline and choose release and new pipeline to set up a new deployment.Select the release template from the list suitable for the project, provide required permission,choose deployment target (deployment groups) or provide service connection for cloud as requested by job ,add additional tasks and jobs required for deployment and set the source for the deployment. The source for the deployment is referred to as artifacts and they can be build pipeline output or project source from providers. After completing all the stages click save to save the pipeline and release to initiate the deployment.

Above described process is intended to give a simple visualisation on how CI/CD using Azure pipeline can be achieved. Additional configuration and tasks can be added to the build/release pipeline via Azure marketplace and the pipelines can be configured to run on schedule, set condition for execution,chain together for sequential execution, multistage deployment with approval and more. Only a portion of Azure devops pipeline is discussed here besides this one can take full benefit of other services provided by Azure devops to build a software product from beginning to end.
Full document on step by step process for CI/CD using Azure pipeline can be found here.
Official Documentation can be found here.