Salesforce Development
Setting up Salesforce Organization
Before starting anything with salesforce we need to set up our salesforce environment, to do so navigate to https://developer.salesforce.com/ and click signup on the top right of the menu bar.
Fill up the form(s) required and once the signup is completed. Log in with your developer account and you can explore salesforce.
Install Salesforce command-line interface
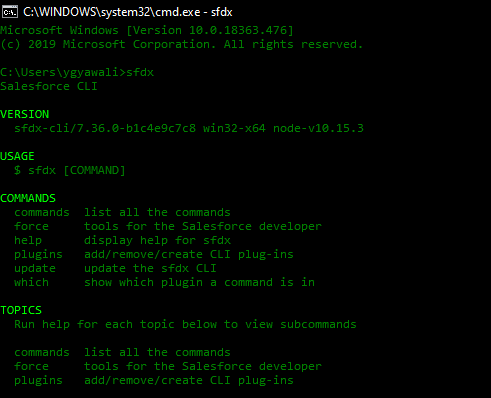
First of all, Instal VS Code along with download the CLI installer from the salesforce official website, https://developer.salesforce.com/tools/sfdxcli. Follow the installer setup to install the CLI on your machine. After the installation is completed, open up the terminal/command window and enter sfdx. The command should return the resultset with usage and version of the CLI upon successful installation.
Install Salesforce extension
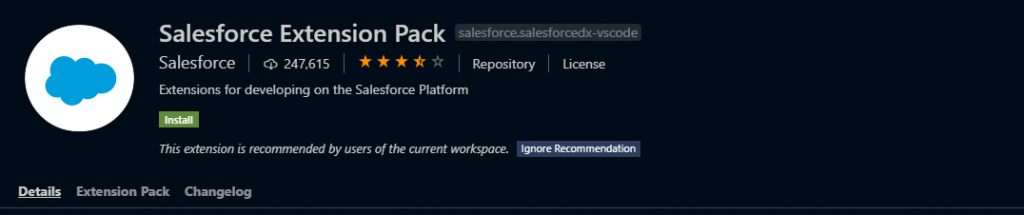
If Visual Studio Code is already installed in previous steps, we can follow the following steps to install Salesforce extension for visual studio code. Launch the visual studio code and click on the extension icon from the side menu bar and enter the “Salesforce Extension pack†in the search box. Select the one created by salesforce and click install.
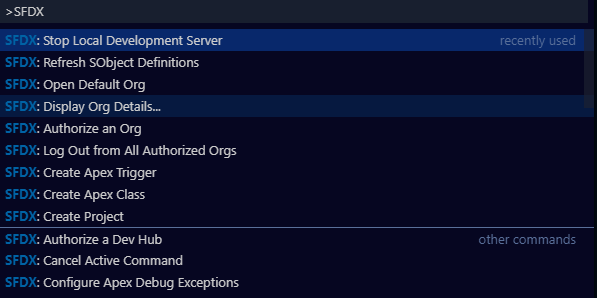
After the installation is completed, restart VS-Code if required. Now Go to View>Command Palette and Type SFDX,
It should display a list of commands if the installation is complete.
Creating a project
Lunch Visual studio code and open command palette.On command palette type “SFDX:Create Project†and click enter. Choose the template for the project as required.

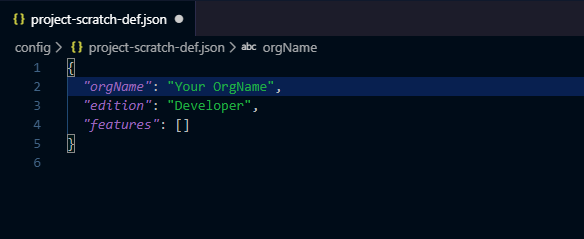
Provide a name for the project and select a location for the project. After the Project has been created, open “project-scratch-def.json†located inside the config folder and change the organization name to your organization
Authorizing the organization
After creating the project, we need to authorize our organization so that we can deploy our changes to our salesforce organization directly from our VS code development setup. Open Command Palette and Type “SFDX:Authorize An Orgâ€.

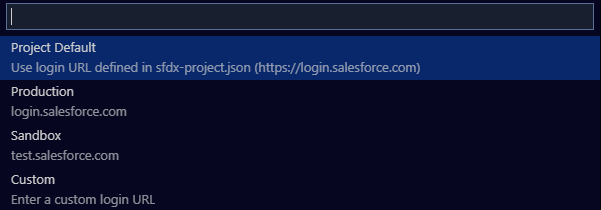
Choose the URL from project default or any other you would like to use to authenticate. The project default is set at sfdx-project.json file as sfdxLoginURL.
Provide an alias and press enter. It will then redirect you to a salesforce login page, provide your salesforce username and password and click login. After successful login, you’ll be prompted with a consent page requesting the required permissions, Accept It.
The Organization should be now be authorized, you can confirm by typing “SFDX:Open Default Org†in the command palette. This command will open your organization’s Salesforce env in the default browser with you as logged in user.

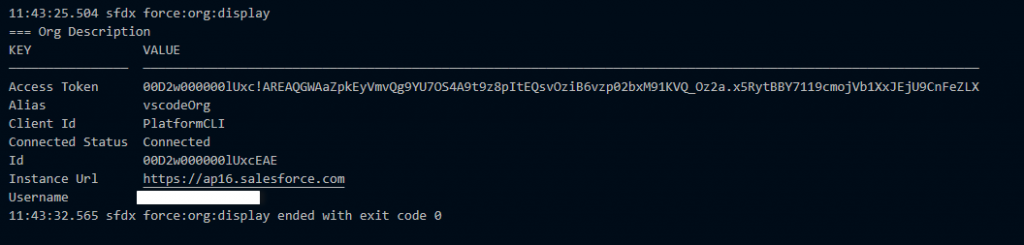
Or in command palette type “SFDX: Display Org details for default org: and hit enter
And it will return the following result on the VS Code terminal window.
After the above steps have been done, we can now write code, test and deploy them to our remote salesforce organization from visual studio code. Salesforce lets you write code in its custom programming language APEX. Version Control such as git and svn can be also be used.
Deploying Code to Salesforce
To deploy the code to the salesforce from visual studio code, right-click the folder or file that you want to deploy.
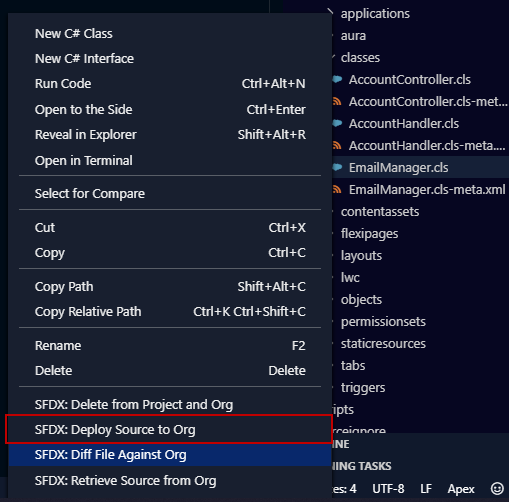
This will publish the code to your salesforce environment.
Creating Package
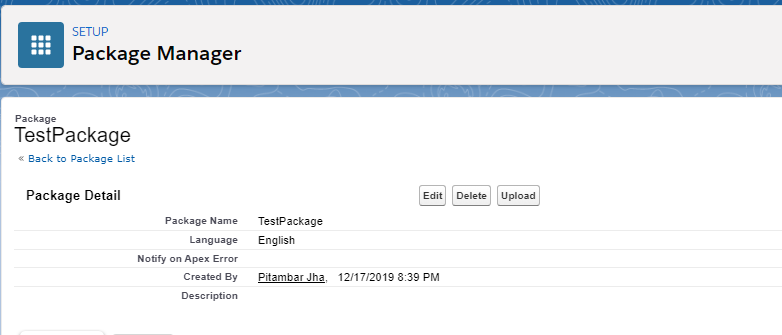
For creating the package, From Setup, enter Packages in the Quick Find box, then select Packages Manager should appear under sub-section Packaging under Apps.
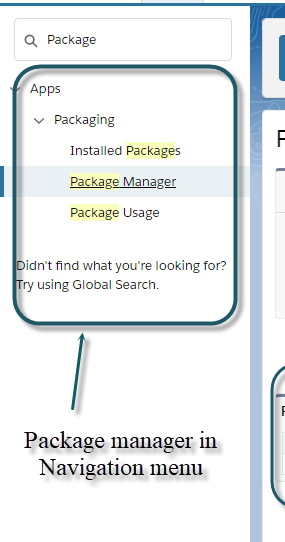
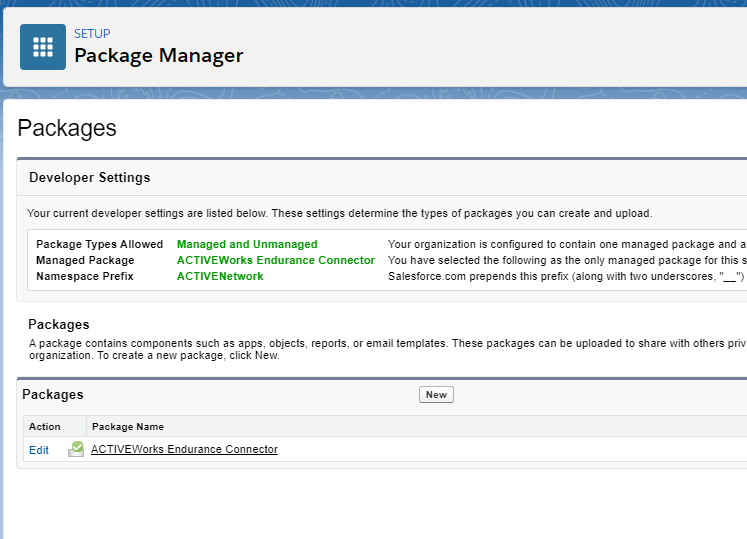
Click on Package Manager, and the Package manager page will Appear. The managed package is to be packaged for the installation and also ready for publishing on the App Exchange Market place. Steps to Create package includes
- Open Package Manager Page.
- Click New.
- Fill in the details of the package.
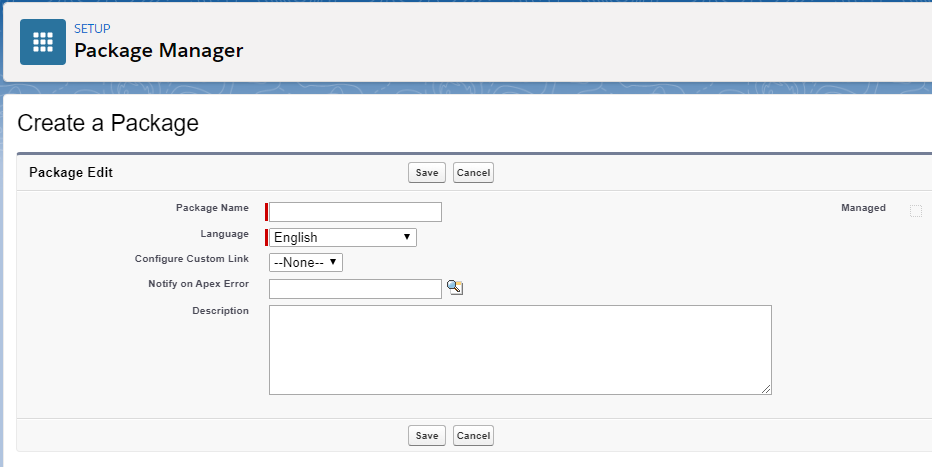
- Click Save.
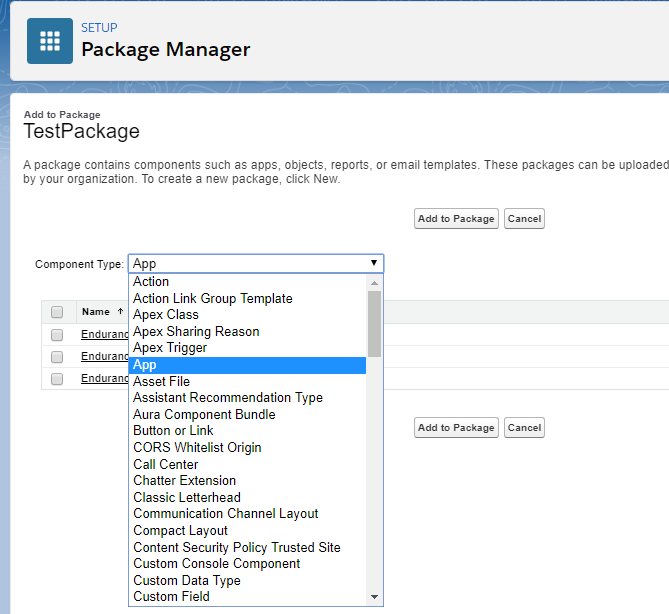
- Add the necessary components for your app.
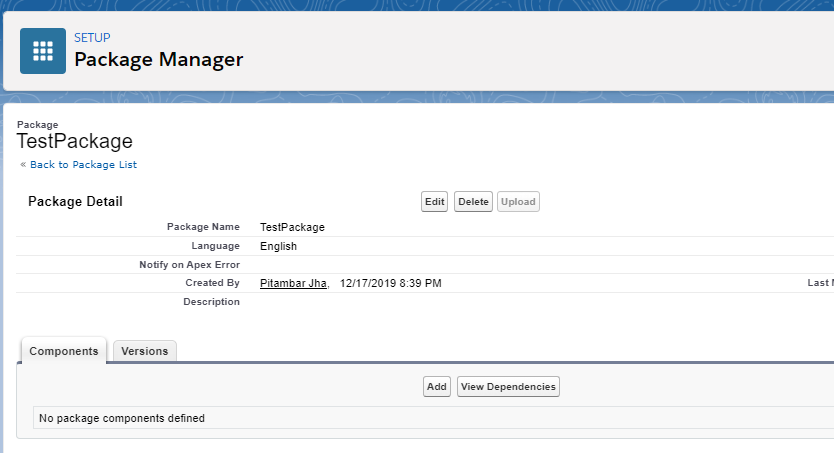
- Click Add in Components Section.
- From the drop-down list, choose the type of component and click Add to Package.
- After all the component is added, click on upload.
- Enter Version Name, Version Number, Password (Optional), package requirement and press
- It takes some time to create a package. And then, package installation URL can be found under the section Version Detail.
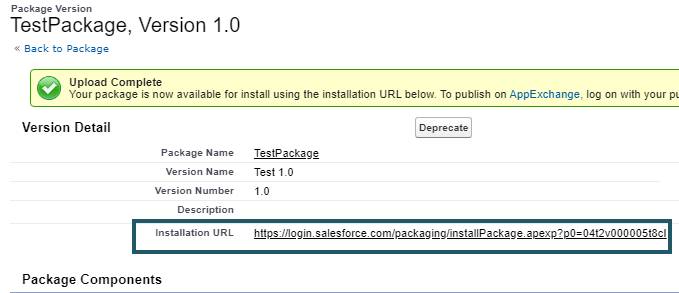
This installation URL can be used on another salesforce instance to install the package.